Wednesday, July 18, 2012
Strawberry Delight
This tutorial is my property, written by Jeannine’sTag,
any resemblance to another tutorial is a coincidence.
Do not share my tutorial, send a link to my blog.
Do not share my tutorial, send a link to my blog.
Supplies Needed:
PSP
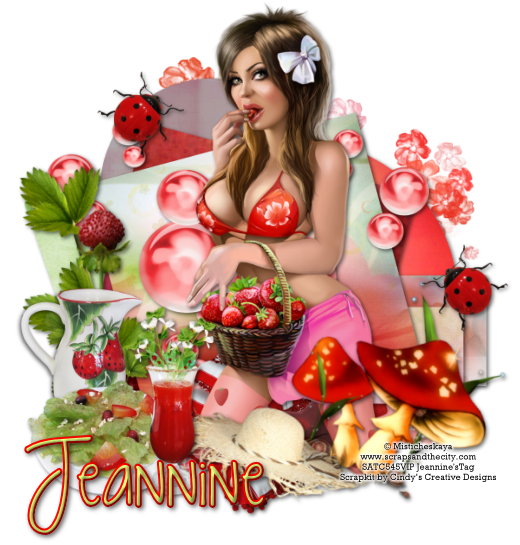
Tube of choice. I am using “Laidy Berry” from Misticheskaya
PTU scrap kit “Strawberry Delight” from Cindy’s Creative Designs
don’t use the tube without licence
You can purchase tube and kit on SATC
Template “144” by Leah
Font: KG StrawberryLimeade
Drop shadow: 2 - 2 – 60 - 7
Lets get started…..!
Open template – shift D – resize width 550 - Image canvas size 600 x 600
center - delete credit & bg
Open “Bling 1” resize width 550 – copy and paste as new layer – layer
arrange – send to bottom
Highlight
Layer 7– selection –
select all – float – defloat – open paper 3 –shift D – resize width 550 – copy
and paste as new layer – selection invert – delete – add drop shadow
Layer 6– selection –
select all – float – defloat – open paper 13–shift D – copy and paste as new
layer – selection invert – delete – add drop shadow
Layer 5– selection –
select all – float – defloat – open paper 9 –shift D – copy and paste as new
layer – selection invert – delete – add drop shadow
Layer 4 – selection –
select all – float – defloat – open paper 7 – shift D – resize width 550 - copy
and paste as new layer – selection invert – delete - add drop shadow
Layer 3 – selection –
select all – float – defloat – open paper 5 – shift D – resize width 550 - copy
and paste as new layer – selection invert – delete - add drop shadow
Layer 2 – selection –
select all – float – defloat – open paper 10 – shift D – resize width 550 -
copy and paste as new layer – selection invert – delete - add drop shadow
Layer 1 – selection –
select all – float – defloat – open paper 7 – shift D – resize width 550 - copy
and paste as new layer – selection invert – delete - add drop shadow
Open Bubble 1 – width 310 – paste on the
right side from template - duplicate – image mirror
Add drop shadow
Open
elements and resize (if needed):
Never work on the original design - always
shift D
(Be careful when you resize or
rotate it is sometimes
necessary to sharpen)
Pillow 2 – width 280
Mushroom – width 240
Lady Bug – width 100 –duplicate
(mirror this one)
Strawberries 6 – width 150
Vase 1 – width 140
Hat 1 – width 250 –image
rotate free right 20°
Drink 2 – width 100
Salad 1 – width 180
Place all items (look at
my tag for example)
Copy - Paste your tube as new layer. Resize if need it.
Add copyright info. Merge visible.
I resize mine width 520
Save as png or jpg.
Enjoy
this tutorial and I'd
like to see your results, you can
email me
Subscribe to:
Post Comments
(Atom)
My Blog List
-
-
NEWS 20203 years ago
-

0 comments:
Post a Comment